
Uterine fibroid embolization (UFE)
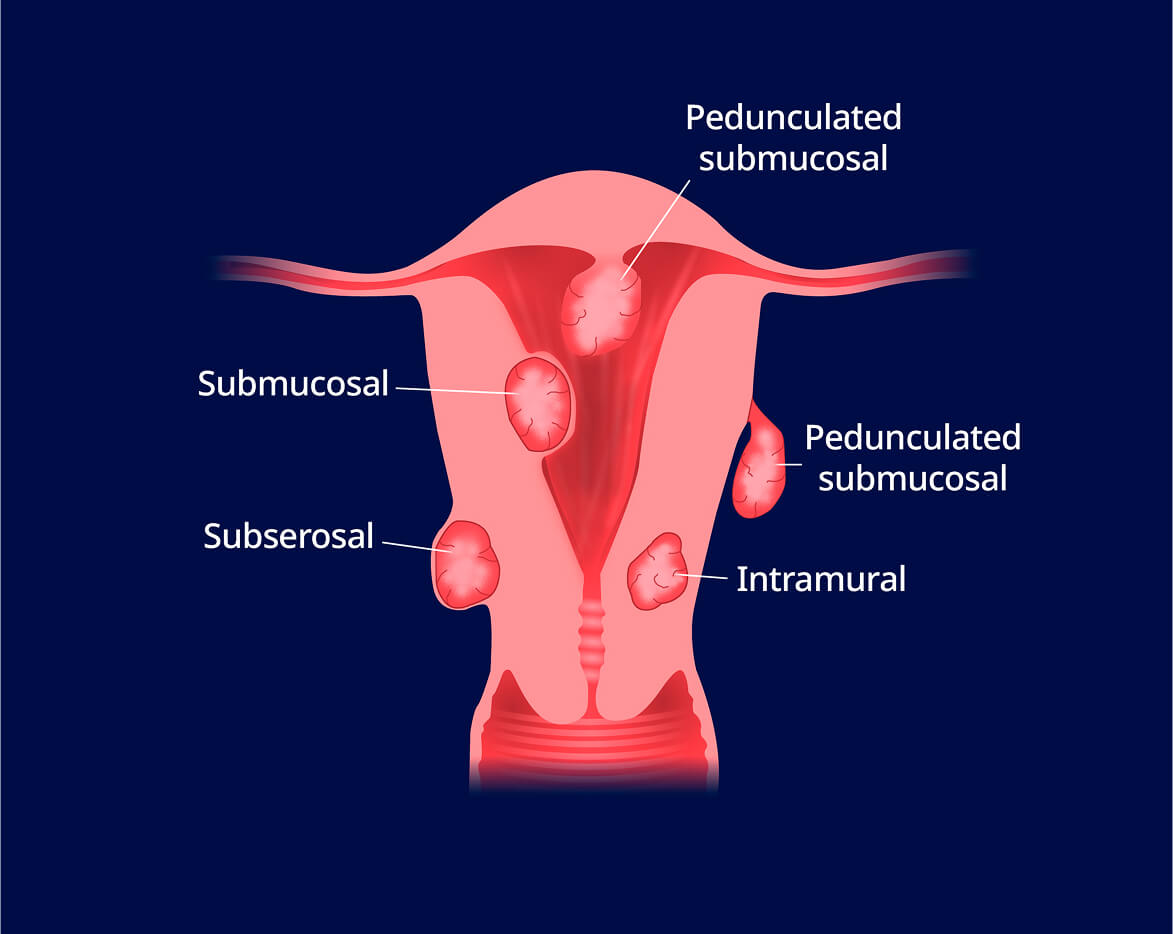
- What are uterine fibroids?
- Who is a candidate for UFE?
- How is UFE performed?
- What are the benefits of UFE?
40-80% of people with a uterus have fibroids.2

UFE has a 90% average success rate.1


Uterine fibroid embolization has a 90% average success rate. After five years, about 80% of women have no symptoms. In four out of five women, no further procedure is needed.1
Most women experience cramping, nausea, and low-grade fever immediately following the procedure. In 3-4% of cases, infection may occur. In fewer than 1% of cases, serious complications occur, requiring a hysterectomy.
Generally, uterine fibroids are non-cancerous tumors. In rare cases, though, fibroids may contain cancerous cells. If you're at high risk for uterine cancer, your doctor may recommend a biopsy.
If left untreated, fibroids can grow and cause worsening symptoms. Fibroids may press against a ureter, which can lead to urinary problems. In very rare cases, fibroids can burst, requiring surgery.
Our centers take most insurance plans. However, always check with your insurance provider to understand what your plan covers.


© 2017-2026 Fresenius Medical Care. All rights reserved.